 Go to GitHub
Deployment
Deploy on Device
The basic steps are also found on the official Microsoft page here. Once the test run was successful, you’re now ready to deploy chARpack to your HoloLens2. Again, go to
File > Build ProfilesThis time, click on Build, which opens a folder dialog.

Create a folder named build inside the chARpack project folder and select it using the dialog.
Unity should start the Building Player process.
When finished, go to the freshly created build folder and open the .sln file that is located there.
This will start up Visual Studio.
In the solution explorer, right click chARpack (Universal Windows) and select Set as Startup Project.
Set Release as solution configuration and ARM64 as solution platforms.
Choose Remote Machine as device.
Trouble with the Burst Compiler
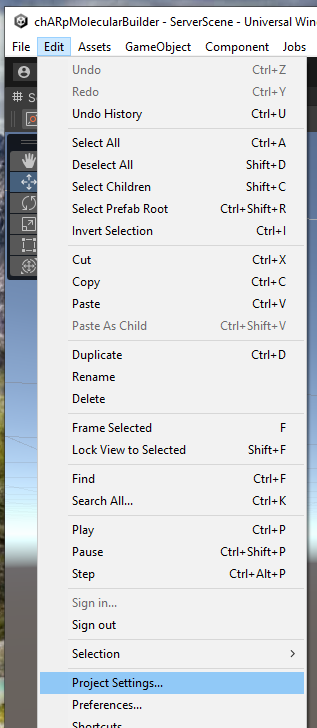
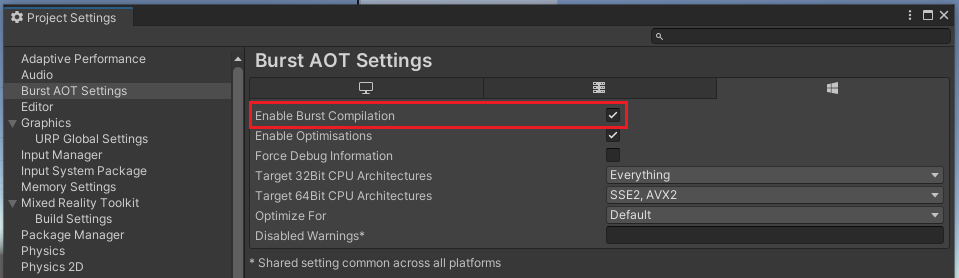
Sometimes, Unity has problems finding the correct currently installed VS version/SDK. This results in errors during the Build process. In some cases reinstalling VS helps. However, if you do not want to reinstall VS or this simply does not help, you have to deactivate the Burst compiler. Go to the Player Settings
Find the section Burst AOT Settings and undo the checkmark on Enable Burst Compilation.
IP of your HoloLens2
To be able to deploy chARpack via WiFi, you need to connect your machine that runs Unity to the same network (or a reachable network) as the HoloLens2. Open the WiFi options on the HoloLens2 and click on Adapter Settings. Scroll down until you can find the device’s IP address.
Make sure that your HoloLens2 is in Developer Mode.
Back to VS
You now have two options for deploying the project on your HoloLens2.
Start on remote machine from Visual Studio
Right click chARpack (Universal Windows) in the solution explorer again and go to Properties. Make sure you’re on the same configuration and platform as set earlier. Go to the section Debugging and put your device’s IP address into the field Machine Name. Confirm these settings by clicking OK. In the main bar, click on Debug and run the build and deploy by selecting Start Without Debugging.
Running this for the first time requires you to pair your HoloLens2 with Visual Studio.
Check the Microsoft documentation for instructions.
Successfully deploying chARpack on the HoloLens2 should start it automatically. Now you’re ready to use chARpack.
Upload an app package via the device portal
Right click chARpack (Universal Windows) in the solution explorer and go to Publish > Create App Packages. In the following dialogue, make sure you have selected the same configuration and platform as earlier. For all other options, the default settings are usually fine.
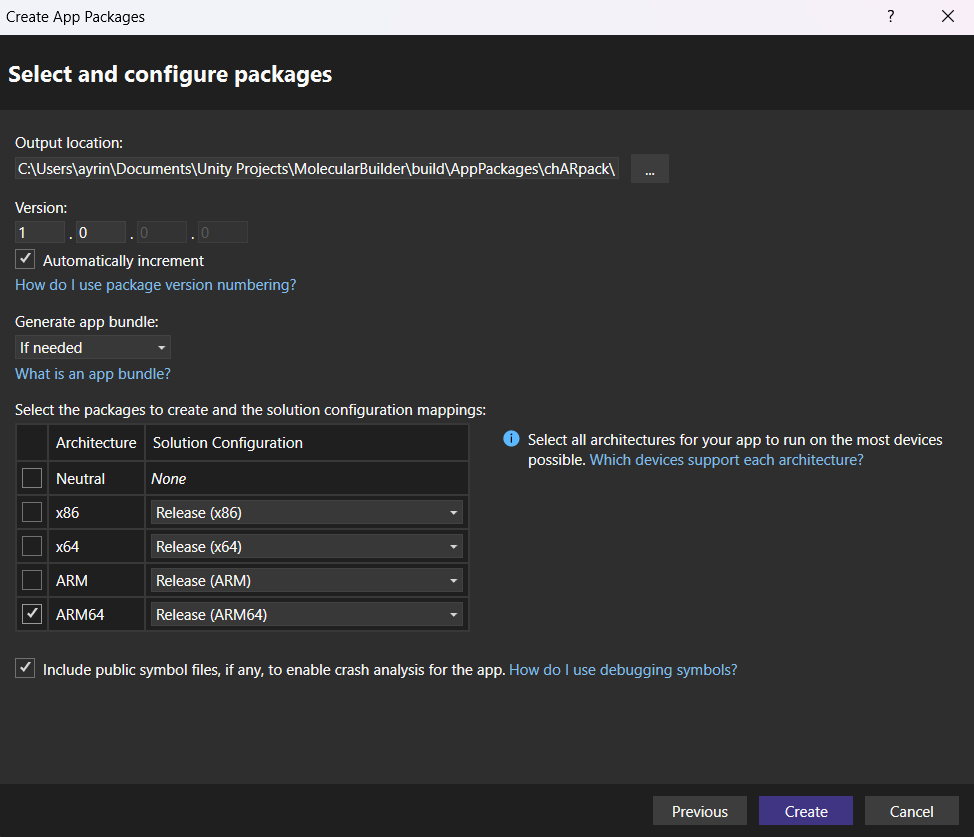
Click Create and wait for the build to finish.
You can now upload the app package to the HoloLens2 using the device portal. The steps to connect to the device portal are outlined in the Microsoft documentation.
On the device portal page, navigate to Views > Apps. In the section Deploy Apps, make sure Local Storage is selected and click Choose file. In the following dialogue, navigate to the .appx file created by Visual Studio in the previous step. Select Install. Once the installation is finished, you can access the chARpack app from the main menu on your HoloLens2.
Deploy on Meta Quest 2 & 3
If you want to deploy the app to a Meta Quest device, switch your Build Platform to Android in the Build Settings.
You can either directly build and deploy on to device or build an .apk file which you can deploy manually via the Meta Quest Developer Hub.
In any case you should download the Developer Hub to activate the Developer Mode on your device.
If the Developer Mode is already activated and your device is connected via USB to the PC that runs Unity, then your Meta Quest device should show up in the Build Settings in the Run Device list.
From here you can Build and Run to directly upload the software to your device.
Hosting
It is recommended to either start the server scene in the Unity editor or run a build of chARpack on a normal desktop machine. Make sure the machine that operates the server is reachable in the network and from the devices. The connection operates on port 9050 and the LAN discovery on port 9051. If you want to connect to a machine outside of your network make also sure that port 9050 is forwarded to the machine that acts as server. In case you cannot operate on these two ports, you have to go to
Assets > scripts > networking > LoginData.csand change the port information in this file. To be able to benefit from these changes, all compiled and deployed versions of chARpack have to be recompiled and redeployed.
When everything is set up to start the server either start the server scene directly by double clicking
Assets > Scenes > ServerScenein Unity editor, or press the Host button in the login screen.
Deploying the Windows Standalone app
To deploy the Windows standalone app, switch your Build Platform to Windows, Mac, Linux in the Build Settings. Make sure only the Server Scene is selected in Scenes in Build and that Create Visual Studio Solution is checked. Then click on Build and select the folder to build to (if necessary, create a new one).
Once Unity has finished the build process, go to your chosen folder and open the .sln file located there in Visual Studio.
Now, you can start the Standalone app by clicking on Debug in the main bar and run the build and deploy by selecting Start Without Debugging.